Categories
computer

Ubuntu 12.10 to 13.04 Server Upgrade Error

Are you Googl’ing around trying to figure out why you’re getting this error when trying to `do-release-upgrade’ your Ubuntu 12.10 system, even though you’re pretty much up to date?

root@mia:~# do-release-upgrade
Checking for a new Ubuntu release
Traceback (most recent call last):
File “/usr/bin/do-release-upgrade”, line 145, in <module>
fetcher.run_options += [“–mode=%s” % options.mode,
AttributeError: type object ‘DistUpgradeFetcherCore’ has no attribute ‘run_options’
Error in sys.excepthook:
Traceback (most recent call last):
File “/usr/lib/python3/dist-packages/apport_python_hook.py”, line 137, in apport_excepthook
os.O_WRONLY | os.O_CREAT | os.O_EXCL, 0o640), ‘wb’) as f:
OSError: [Errno 2] No such file or directory: ‘/var/crash/_usr_bin_do-release-upgrade.0.crash’

Original exception was:
Traceback (most recent call last):
File “/usr/bin/do-release-upgrade”, line 145, in <module>
fetcher.run_options += [“–mode=%s” % options.mode,
AttributeError: type object ‘DistUpgradeFetcherCore’ has no attribute ‘run_options’
root@mia:~#
deb http://gb.archive.ubuntu.com/ubuntu/ quantal-updates main restricted
deb-src http://gb.archive.ubuntu.com/ubuntu/ quantal-updates main restricted

I just burned a couple hours trying to figure out why I only got this error on one specific server. It turns out that it’s a bug in the version of  the ubuntu-release-upgrader-core package, and you must be pulling updates from a “quantal-updates” repository to get the fixed package when you `apt-get upgrade’. To fix this, edit your /etc/apt/sources.list and make sure you have the following two lines:

deb http://gb.archive.ubuntu.com/ubuntu/ quantal-updates main restricted
deb-src http://gb.archive.ubuntu.com/ubuntu/ quantal-updates main restricted

After making sure you have these lines, get yourself updated again and re-try the release upgrade script:

apt-get update
apt-get upgrade
do-release-upgrade

…and you should be rollin’ towards Raring!
Categories
computer Uncategorized

How To Custom Brand The OpenStack “Horizon” Dashboard

I’m deploying OpenStack “Essex” on Ubuntu Server 12.04, and have the openstack-dashboard package installed to provide the web-based “Horizon” GUI component newly added for the Essex release. Canonical also provides an openstack-dashboard-ubuntu-theme package that brands the Python-based Django GUI. Despite that the last major Canonical-maintained packages based on the OpenStack “Diablo” release in Ubuntu 11.10 did not include an administrative GUI, Horizon — as a standalone component — has been very stable for a mainstream debut. In the future, though, I’d like to see a quick and easy way to change the default branding to use your own logo, colors, and titles using only the GUI’s administrative screens.

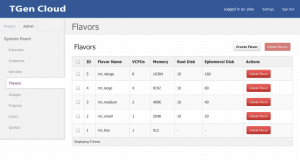
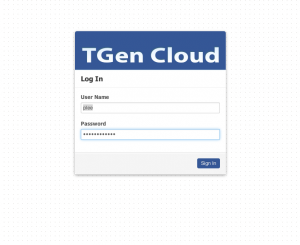
The horizon documents briefly mention branding customization to give you a head start, but you probably want more specific steps. Here’s my custom-branded Horizon dashboard with custom colors, logo, and site title:

Once you know where to make the appropriate changes, it’s super simple. Step-by-step:

  1. Create a graphical logo with a transparent background. The text “TGen Cloud” in this example is actually rendered via .png files of multiple sizes I created with a graphics program. I used a 200×27 for the logged-in banner graphic, and 365×50 for the login screen graphic.
  2. Set the HTML title (shown at the top of the browser window) by adding the following line to /etc/openstack-dashboard/local_settings.py
    SITE_BRANDING = "Example, Inc. Cloud"
  3. Upload your new graphic files to:
    /usr/share/openstack-dashboard/openstack_dashboard/static/dashboard/img/
  4. Create a new CSS stylesheet — we’ll call ours custom.css — in the directory:
    /usr/share/openstack-dashboard/openstack_dashboard/static/dashboard/css/
  5. Edit your CSS file using the following as a starting point for customization, which simply overrides the Ubuntu customizations made in the ubuntu.css file. Change the colors and image file names as appropriate, though the relative directory paths should be the same.
    /*
    * New theme colors for dashboard that override the defaults:
    *  dark blue: #355796 / rgb(53, 87, 150)
    *  light blue: #BAD3E1 / rgb(186, 211, 225)
    *
    * By Preston Lee <plee@tgen.org>
    */
    h1.brand {
    background: #355796 repeat-x top left;
    border-bottom: 2px solid #BAD3E1;
    }
    
    h1.brand a {
    background: url(../img/my_cloud_logo_small.png) top left no-repeat;
    }
    
    #splash .login {
    background: #355796 url(../img/my_cloud_logo_medium.png) no-repeat center 35px;
    }
    
    #splash .login .modal-header {
    border-top: 1px solid #BAD3E1;
    }
    
    .btn-primary {
    background-image: none !important;
    background-color: #355796 !important;
    border: none !important;
    box-shadow: none;
    }
    
    .btn-primary:hover,
    .btn-primary:active {
    border: none;
    box-shadow: none;
    background-color: #BAD3E1 !important;
    text-decoration: none;
    }
  6. Open the following HTML template in an editor:
    /usr/share/openstack-dashboard/openstack_dashboard/templates/_stylesheets.html
  7. Add a line to include your new stylesheet: (I’ve highlighted the new line in bold.)
    ...
     <link href='{{ STATIC_URL }}bootstrap/css/bootstrap.min.css' media='screen' rel='stylesheet' />
     <link href='{{ STATIC_URL }}dashboard/css/{% choose_css %}' media='screen' rel='stylesheet' />
     <link href='{{ STATIC_URL }}dashboard/css/custom.css' media='screen' rel='stylesheet' />
    ...
  8. Restart apache just for good measure:
     sudo service apache2 restart
  9. Reload the dashboard in your browser and fine tune your CSS appropriate.

You’re done!

[ezcc]

Categories
computer Uncategorized

OpenStack Nova Essex MySQL Database Schema Diagram and SQL

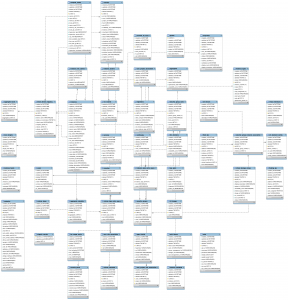
I’m in the process of setting up an OpenStack Essex installation on a small cluster of Ubuntu 12.04 servers using the Canonical-supplied and supported packages. I innocently and unfortunately ended up with a state corruption issue causing nova-compute to crash on startup, and found it necessary to dive into the schema as a troubleshooting aid. I used MySQL workbench to reverse-engineer the schema into an EER diagram as well as raw SQL. I’m sure others will find this useful as the OpenStack community slowly upgrades to Essex. Hope it helps!

[Download diagram, SQL, and MySQL workbench file]

Categories
computer

OpenStack Diablo on Ubuntu 11.10 w/MySQL

If you’re installing the OpenStack cloud computing platform “Diablo” release on Ubuntu 11.10 server using the official guide and are using MySQL, don’t forget to:

sudo apt-get install python-mysqldb

The “glance” package (and probably others) are configured to use SQLite by default and do not automatically install this dependency by default. Unfortunately, the November 2011 version of the manual also fails to mention this and the log file (/var/log/glance/registry.log) prints a variety of “INFO [sqlalchemy.engine.base.Engine…” messages but no warnings or errors. I assume a corresponding comment applies to PostgreSQL as well but have not confirmed.

Categories
computer

Upgrading From Ruby 1.9.1 to Ruby 1.9.2

I’ve spent half the day so far inbeded in the furious stressful upgrade process of a handful of Ubuntu Linux 10.04 and Mac OS X Snow Leopard systems from Ruby 1.9.1 to Ruby 1.9.2. I haven’t even gotten to the Rails 3.0.0 stuff yet: just the baseline Ruby installation. I’ve gone through the upgrade process on both types of systems so far and the base issues have been the same. Here’s a common issue that many people are running into:

preston$ gem1.9

/opt/local/lib/ruby1.9/site_ruby/1.9.1/rubygems/source_index.rb:68:in `installed_spec_directories’: undefined method `path’ for Gem:Module (NoMethodError)
from /opt/local/lib/ruby1.9/site_ruby/1.9.1/rubygems/source_index.rb:58:in `from_installed_gems’
from /opt/local/lib/ruby1.9/site_ruby/1.9.1/rubygems.rb:883:in `source_index’
from /opt/local/lib/ruby1.9/site_ruby/1.9.1/rubygems/gem_path_searcher.rb:81:in `init_gemspecs’
from /opt/local/lib/ruby1.9/site_ruby/1.9.1/rubygems/gem_path_searcher.rb:13:in `initialize’
from /opt/local/lib/ruby1.9/site_ruby/1.9.1/rubygems.rb:841:in `new’
from /opt/local/lib/ruby1.9/site_ruby/1.9.1/rubygems.rb:841:in `block in searcher’
from <internal:prelude>:10:in `synchronize’
<…and so on…>

Assuming you’re upgrading from a previous Ruby installation, note that the “site_ruby” directories are no longer used, and will eff up your 1.9.2 installation if you fail to delete them after the install. On OS X, run:

sudo rm -rf /opt/local/lib/ruby1.9/site_ruby/

On Ubuntu Linux 10.04, run:

rm -rf /usr/local/lib/ruby/site_ruby/

…to correct this issue. All note that you may see errors such as this:

root@li92-132:~# rake –version

/usr/local/lib/ruby/1.9.1/rubygems.rb:340:in `bin_path’: can’t find executable rake for rake-0.8.7 (Gem::Exception)

from /usr/local/bin/rake:19:in `<main>’

…despite have a rake gem installed. Apparently 1.9.2 comes with a version of rake internally, but is unable to find it for some reason relating to the rake.gemspec file. Remove the file to fix this issue. On Ubuntu Linux 10.04, run:
rm /usr/local/lib/ruby/gems/1.9.1/specifications/rake.gemspec
Notice the “1.9.1” path of the PATH. Yeah.. it’s weird. But for compatibility reasons your 1.9.2 installation will continue to use a path with 1.9.1. To quote the Ruby 1.9.2 FAQ page:
The standard library is installed in /usr/local/lib/ruby/1.9.1
This version number is “library compatibility version”. Ruby 1.9.2 is mostly compatible with the 1.9.1, so its library is installed in the directory.
I’m sure there’s a wonderful technical reason for this, but it’s still misleading and confusing as hell. I ended up manually deleting a bunch of stuff I shouldn’t have because I thought I was innocently “cleaning up” after the old version. Whatever. Additional suggestions:
  • Just to keep things clean, you may also want to remove your old Ruby 1.8.x builds. (I recommend doing so unless you have older apps that haven’t moved to 1.9.x yet.)
  • Phusion Passenger seems to work fine on Ubuntu 10.04 with the latest version of Apache 2 as of this writing, though don’t forget to recompile, reinstall, reconfigure and restart apache2 when you do so.
  • Check if you still need rack v1.0.1 installed (for older Rails app) before nuking everything. 🙁
I need a beer!
Categories
computer

20 Steps To Xen: A Quick Xen Tutorial For Ubuntu 7.04 x64 Server

This is an abbreviated and simplified version of a more official document. Run these either as root or with the “sudo” command..

  1. apt-get install ubuntu-xen-desktop-amd64 to install a new Xen kernel and various other tools. Apparently we’re supposed to use the “server” version instead, but it didn’t show up in the repository. Oh well.
  2. apt-get install debootstrap to install the “debootstrap” system bootstraping tool for you.
  3. reboot into the new kernel.
  4. xm list to make sure Domain-0 shows up. Domain-0 represents the host system.
  5. Edit /etc/xen/xend-config.sxp and uncomment “(network-script network-bridge)”. Also comment out “(network-script network-dummy)”.
  6. xend restart to restart the xen daemon.
  7. mkdir -p /xen/slave1 to create a mountpoint for the slave system disk.
  8. dd if=/dev/zero of=/xen/slave1.ext3 bs=1M count=512 to create a 512MB “disk” as a normal file.
  9. mkfs.ext3 /xen/slave1.ext3 to create a file system in said empty file.
  10. mount -o loop -t ext3 /xen/slave1.ext3 /xen/slave1 to manually mount the new filesystem to its mount point.
  11. debootstrap –arch amd64 edgy /xen/slave1 to install a bare bones edgy system onto the new file system.
  12. cp -a /lib/modules/2.6.19-4-generic-amd64/ /xen/slave1/lib/modules/ to install the hosts kernel modules into the new system.
  13. Edit /xen/slave1/etc/network/interfaces. It should look similar to..auto lo
    iface lo inet loopback
    auto eth0
    iface eth0 inet static
    gateway 192.168.1.110
    address 192.168.1.111
    netmask 255.255.255.0
    .. 

    where “gateway” is the host machines IP address, and “address” is a unique IP address for the slave machine.

  14. Update /xen/slave1/etc/hostname with whatever you want its host name to be.
  15. Update /xen/slave1/etc/hosts with all your IP addresses.
  16. Update /xen/slave1/etc/fstab to mount stuff on boot, like so..proc /proc proc defaults 0 0
    /dev/hda1 / ext3 defaults,errors=remount-ro 0 1


  17. umount /xen/slave1 to unmount the file system.
  18. Create /etc/xen/edgy-guest.cfg to configure the host to start the guest, like so..

    kernel = “/boot/vmlinuz-2.6.19-4-generic-amd64”
    ramdisk = “/boot/initrd.img-2.6.19-4-generic-amd64”
    builder=’linux’
    memory = 512
    name = “edgy-slave1”
    vcpus = 1
    vif = [ ‘bridge=xenbr0’ ]
    disk = [ ‘file:/xen/slave1.ext3,ioemu:hda1,w’ ]
    root = “/dev/hda1 ro”
  19. xm create slave1-edgy.cfg to create and start the new domain.
  20. xm console slave1-edgy to establish a console to the new domain. (Hit CTRL+] to exit.)

You should now be able to log in via the xm console as root, and ping the guest on 192.168.1.111 (or whatever its IP address is). w00t!